Mini Halapa

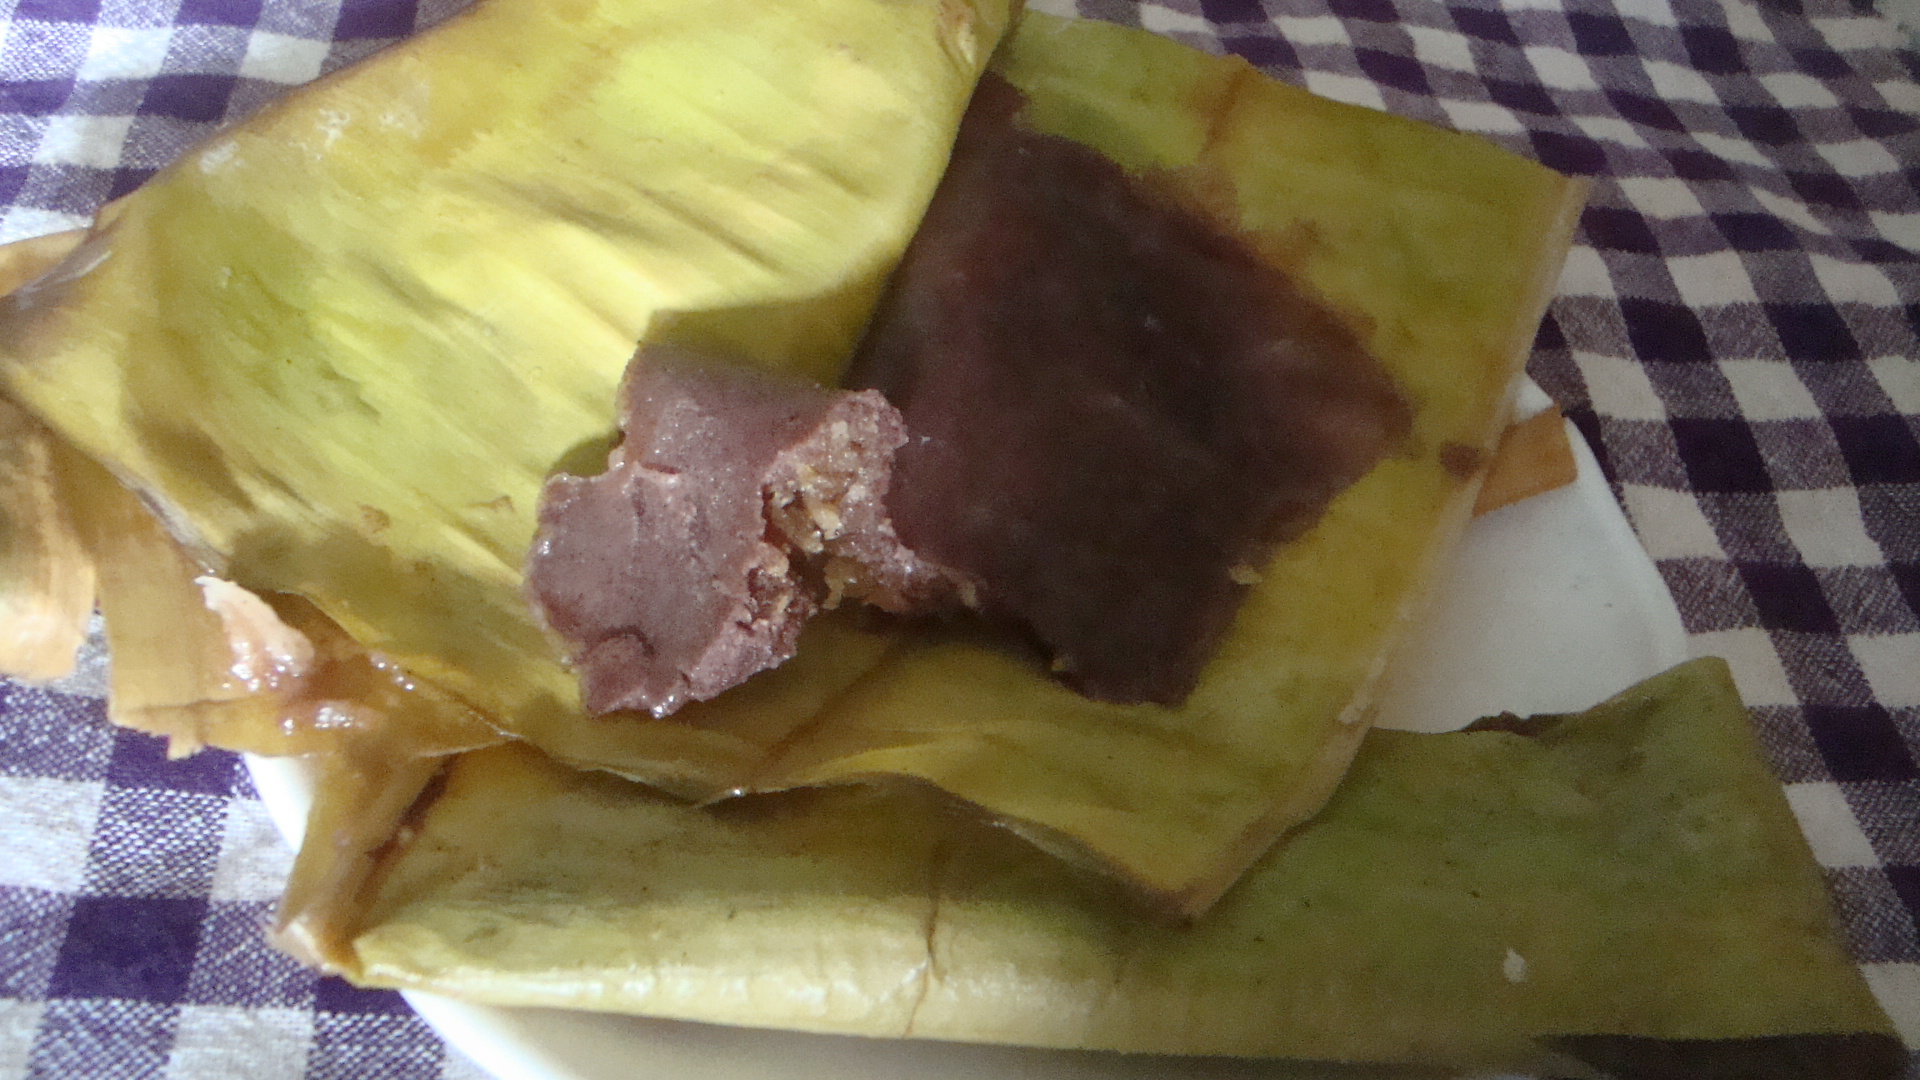
The first time I had halapa was during a train ride from Peradeniya to Colombo. An elderly woman with a basket got onto the train at one of the stations and I noticed that a lot of people were buying her food. I was curious and decided to try out the snack she had made as I did not recognize it. It turned out to be halapa and I was intrigued. It became quite a ritual during my undergraduate years to buy this particular woman’s halapa during my travel home.

I didn’t come across halapa again till many years later when I visited some remote villages in Hambantota district and was served halapa that people had made in their homes. Hence, the reason why I have placed this snack as a specialty of Hambantota besides the fact that kurakkan is primarily grown in Hambantota district and the northern province.

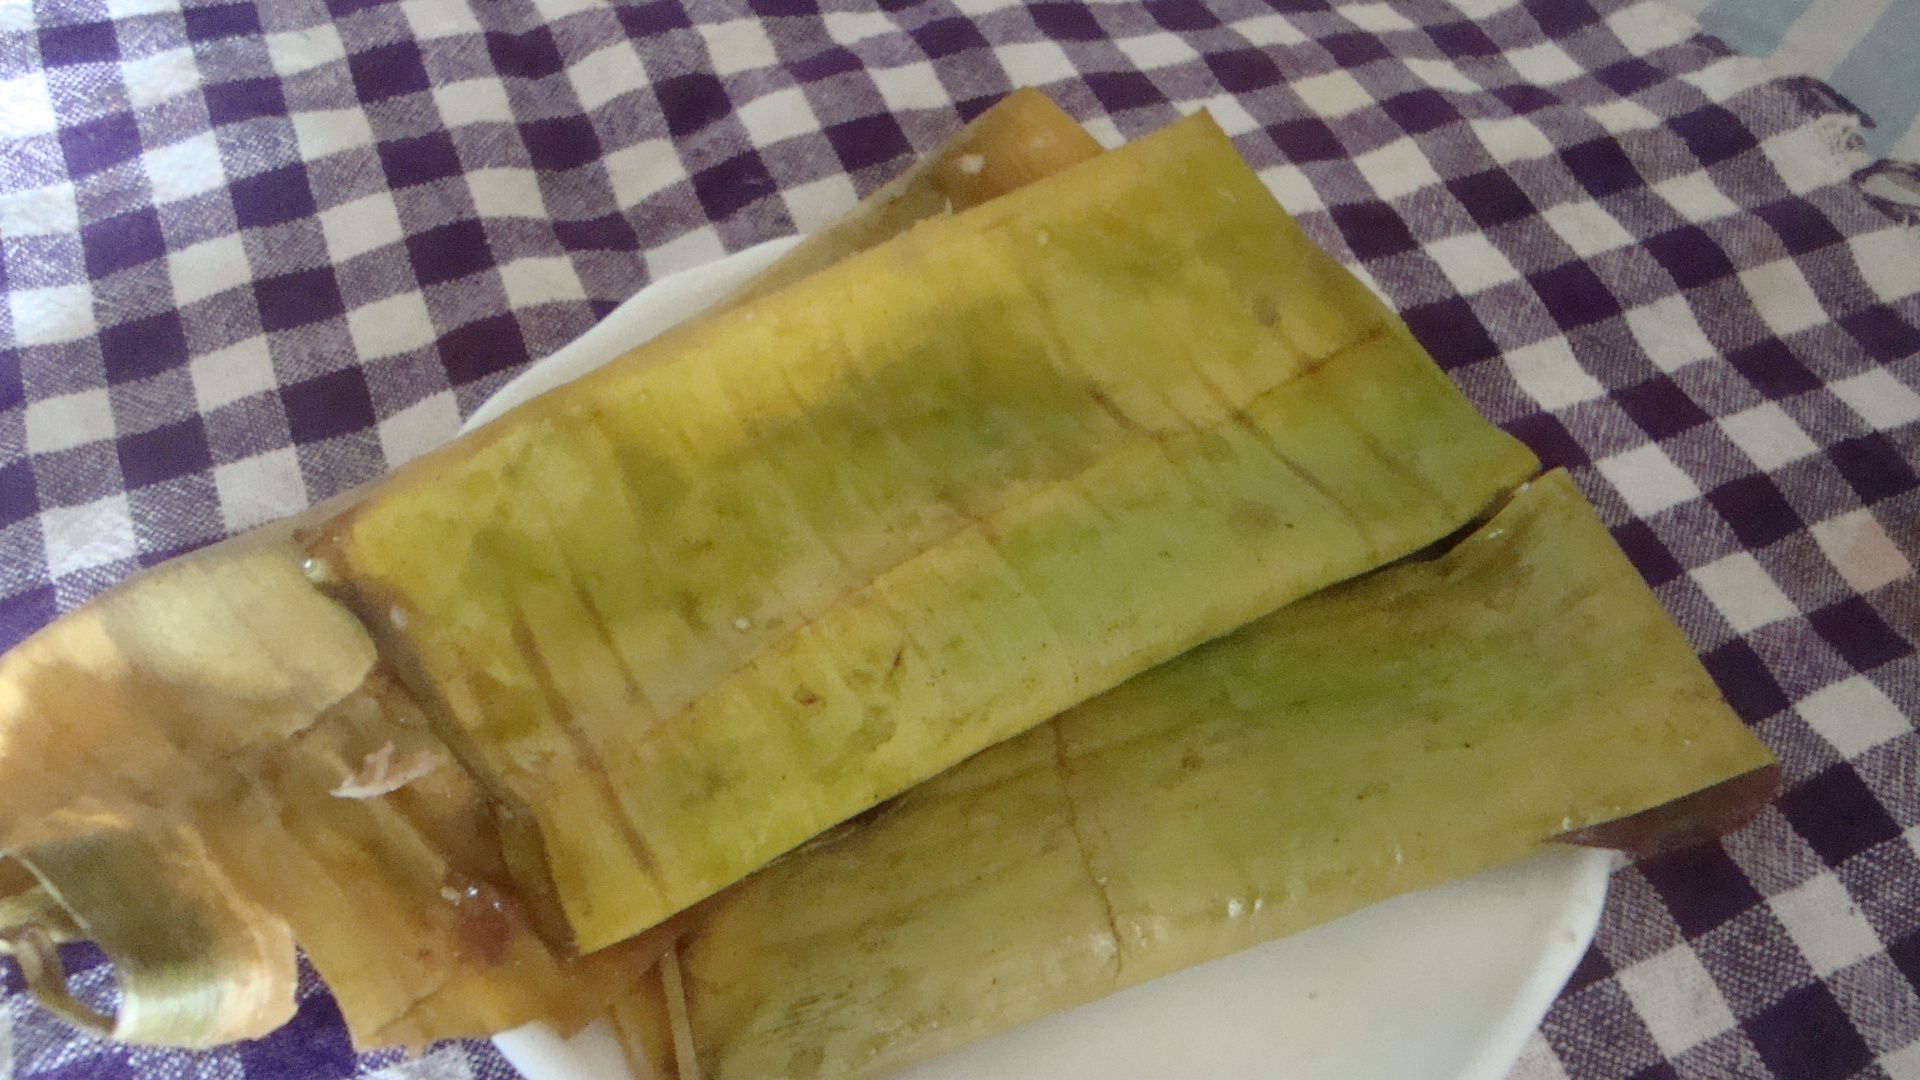
I decided to try my hand at making this snack today and after searching the web, found a recipe for it on srilankanmenu.blogspot.com that I have slightly adapted here according to my taste. While I have used banana leaves, I would recommend using kanda leaves, if you can get hold of it because it adds a unique flavour and texture to the halapa.
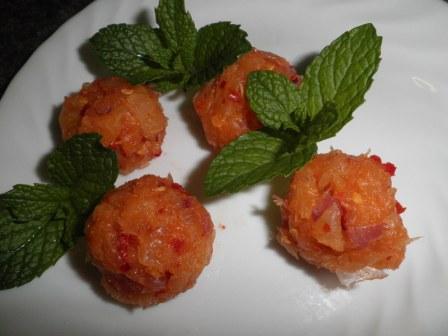
HalapaMini Halapa

Preparation time – ½ hour

Cooking time – 15 mins

Makes 12 mini halapa

Mini halapaIngredients:

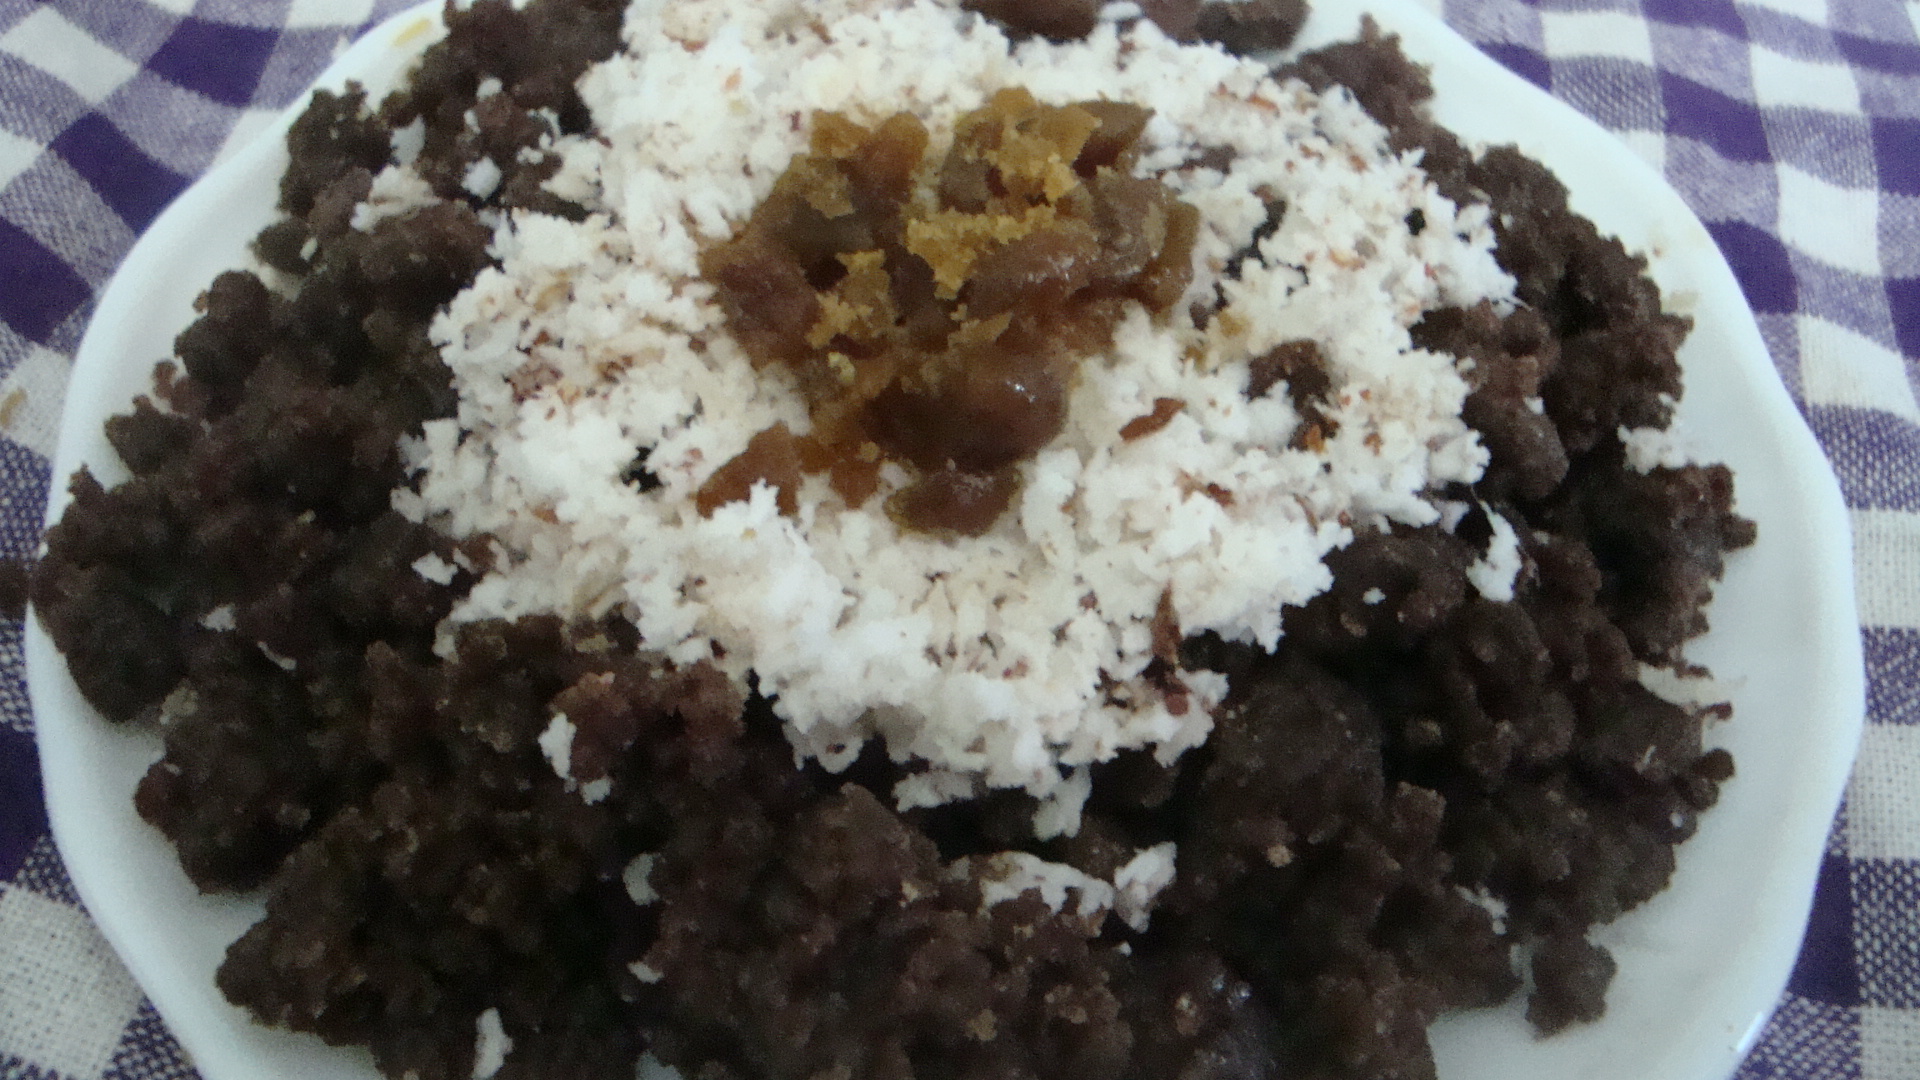
  • Kurakkan flour – 1 cup
  • Coconut – ½ cup, freshly scraped
  • Coconut treacle or kithul pani/ treacle – 4 tbsp
  • Salt, to taste
  • Banana or Kanda leaves

Method:

  1. Lightly heat the freshly scraped coconut in a saucepan and add the coconut treacle. Stir, while the mixture thickens. Remove from stove and allow it to cool.
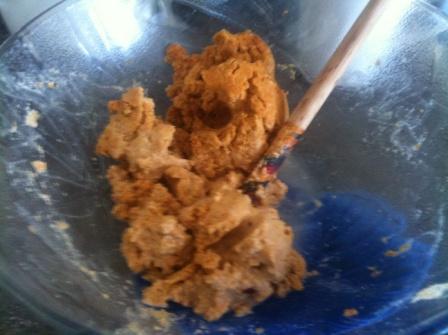
  2. Add a pinch or two of salt to the kurakkan flour. Stir in the warm water and make the dough.
  3. Cut the banana leaf into 12 smaller pieces or use the kanda leaves.
  4. Taking a ball of the dough, spread it on a piece of banana leaf. Take a pinch of the coconut mixture and place it in the center and spread it lightly over the dough. Fold the leaf in half and ensure the edges are folded.
  5. Steam the halapa for 15 mins.
  6. Serve warm with tea.

Papaya Curry

Today’s recipe is that of a papaya curry recipe. While papaya is used in pickles or acharu here, a curry is not so common but my mother likes experimenting with her curries and this turned out delicious. This is also the dish I am sharing for Angie’s Fiesta Friday #2.

Papaya Curry

Time taken: 20 mins

Serves 3

Papaya curryIngredients:

  • Papaya, half-ripe – 1 cup, chopped
  • Onion – ½
  • Capsicum/ Malu miris – 1
  • Fennel seeds – 1 tsp
  • Cloves and Cinnamon – 1 tsp, crushed powder
  • Crushed chillies – 1 tsp
  • Lime – 1 ½
  • Sugar – 1 tbsp
  • Low fat oil – 1 tbsp

Method:

  1. Heat 1 tbsp oil in a pan and lightly fry the chopped onion, malu miris and fennel seeds for 2 minutes.
  2. Then, add the chopped papaya, crushed chillies and the crushed cloves and cinnamon powder to the pan, together with ¼ cup of water.  Cover and cook for about 5 minutes.
  3.  Squeeze and add the juice from 1 ½ limes and the sugar to the pan. Mix well and cook for another 5 minutes. Add a little water if the liquid dries up before that.
  4. Serve with rice.

Recipe source: Raji Thillainathan.

Cassava Thuvaiyal

Today’s guest post is by Krishanthy Kamalraj, who has previously shared her recipe for murukku on this blog. We have another of her lovely snack recipes, with a short intro about the dish from her, today.

Cassava Thuvaiyal

This is somewhat different from Cassava curry. Those days, people in Jaffna usually had cassava plants in their home garden for their own consumption. My grandmother used to make this dish, when we wanted a spicy and filling snack. She dug out immature cassava yam from the garden and made very delicious cassava thuvaiyal for us.

Ingredients

  • 1 medium size immature cassava yam
  • 2-4 dry red chilies
  • ¼ cup small onions
  • ¼ cup grated coconut
  • Mortar and pestle or Mixer or grinding stone
  • Salt to taste

Recipe

1. Thoroughly wash cassava yam and peel the skin.

Cassava2. Cut the yam into small cubes.

Cassava 23. Put the cut cassava pieces in a cooking pan.

4. Add ¼ cup of water into the pan and cook well over medium heat.

5. When cassava has been cooked well (able to slightly smash cassava pieces with spatula), remove from heat.

6. In a mortar, add salt and red chilies. Pound well until it becomes a paste.

chilli paste7. Add cooked cassava and pound well with pestle until it mixes well with chili paste.

8. Add cleaned small onions into the mixture and pound well.

9. When the mixture has reached the consistency to make small balls, take out  from mortar.

10. Using hand, make small balls of the mixture.

11. Now cassava thuvaiyal is ready to serve.

Cassava thuvaiyal

Recipe source: Krishanthy Kamalraj.

Chickpea Fritters

Xīnnián Kuàilè!

Angie (The Novice Gardener) has started her blog event ‘Fiesta Friday‘ auspiciously on the Chinese New Year. So, Wishing you all a happy Lunar New Year and a wonderful party at Angie’s fiesta!

A Taste of Sri Lankan Cuisine’s contribution to the event is this snack recipe of my mother’s – chickpea fritters, which is a very popular snack both in Sri Lanka and India.

Chickpea fritters

Time taken: 30 mins + 3 hours (soaking time)

Serves 8

DSC01041Ingredients:

  • Split chickpea/ kadalai paruppu – ½ cup
  • Chickpea flour – ½ cup
  • Wheat flour – ¼ cup (optional)
  • Onion – 1, chopped
  • Turmeric – ¼ tsp
  • Crushed chillies – 1 to 2 tsp
  • Curry leaves – 1 sprig
  • Carom/ Omam seeds – ½ tsp
  • Salt
  • Low fat oil, for deep-frying

Method:

  1. Soak the chickpea for about 3 hours.
  2. Then, coarsely grind it, i.e. do not grind it to a puree or flour but rather half-grind it so that there are smaller bits of chickpea. Transfer to a mixing bowl.
  3. Add the rest of the ingredients to the bowl and make the fritter dough.
  4. Heat the oil in a pan until it sizzles.
  5. Pinch off a little dough at a time and drop it in the pan. Fry till the fritters are golden brown.
  6. Serve with tea.

Recipe source: Raji Thillainathan.

Garlic and Shallot Curry

Another garlic curry recipe of my mother, this time with shallots. For another version of a garlic curry, do check out the earlier post of the beetroot and garlic curry recipe.

Garlic and Shallot Curry

Time taken: 20 mins

Serves 3

Garlic and Shallot CurryIngredients:

  • Garlic – ¼ cup
  • Shallots – ½ cup
  • Fenugreek seeds – 1 tbsp
  • Tamarind extract – ½ cup
  • Curry powder – 1 tsp
  • Salt, to taste
  • Coconut milk – ¼ cup
  • Sugar – 2 tsp
  • Low fat oil – 1 tbsp

Method:

  1. Clean the garlic and shallots.
  2. Heat 1 tbsp oil in a pan and add the fenugreek seeds. Then, add the shallots and fry for a couple of minutes, before adding the garlic and frying further for a few minutes.
  3. Add the tamarind juice, curry powder and salt to taste to the pan. Mix well and cook for about 5 minutes.
  4. Add the coconut milk and sugar to the pan and cook for another 5 minutes, until gravy thickens and a nice aroma wafts about.
  5. Serve warm with rice or pittu or stringhoppers.

Recipe source: Raji Thillainathan.

FFF

Pudalangai Kulambu

Today’s curry recipe is one of the dishes that I like a lot – pudalangai kulambu or snake gourd curry.

Pudalangai Kulambu

Time taken: 30 mins

Serves 2 or 3

Pudalangai KulambuIngredients:

  • Snake gourd – 1 cup, chopped
  • Onion – ½ , chopped
  • Fenugreek seeds – 2 tsp
  • Curry leaves – 1 sprig
  • Tamarind – ½ cup
  • Coconut milk – ½ cup
  • Curry powder – 1 tsp
  • Salt, to taste
  • Low fat oil – 2 tbsp

Method:

  1. Heat 1 tbsp oil in a pan and fry the onion and fenugreek seeds for a couple of minutes.
  2. Then, add another tbsp oil to the pan and add the chopped snake gourd and curry leaves. Continue frying for a few minutes.
  3. Add the tamarind and milk to the pan, together with the curry powder and salt to taste. Let the curry cook for about 10 – 15 mins over medium heat.
  4. Remove pan from stove when the gravy thickens.
  5. Serve warm with rice or pittu.

Recipe source: Raji Thillainathan.

Cabbage Fritters

Today’s recipe is that of cabbage fritters.

In addition to checking out the recipe below, I would like to invite you to visit this post on one of my other blogs – Perspectives Quilt for a brief introduction about one of my books that can be freely downloaded today on Amazon Kindle.

Cabbage fritters

Time taken: 25 mins

Serves 4 or 5

Cabbage frittersIngredients:

  • Cabbage – ½ cup, shredded
  • Onion – ½, chopped
  • Green chillies – 1 or 2, chopped
  • Crushed red chillies – 1 tsp
  • Chickpea flour – ¼ cup
  • Wheat flour – ¼ cup
  • Ginger – ½ tsp, crushed
  • Garlic – ½ tsp, crushed
  • Salt, to taste
  • Oil, for deep-frying

Method:

  1. Mix all the ingredients, except the oil, together adding a little water to make the fritter dough.
  2. Divide the fritter dough into 4 or 5 portions.
  3. Deep-fry until golden brown.
  4. Serve with rice or as it is.

Recipe source: Raji Thillainathan.

Tomato and Potato Curry

Today’s recipe is a lovely tomato and potato curry, which my mother calls her tomatish potato dish. It is a simple and easy to prepare dish that you will certainly like.

Tomato and Potato Curry

Time taken: 30 mins

Serves 2

Tomatish potatoIngredients:

  • Potato – 1
  • Tomato – 1
  • Onion – ½
  • Green chilli – 1
  • Crushed red chillies – 1 tsp
  • Ginger – ½ tsp, crushed
  • Garlic – ½ tsp, crushed
  • Salt, to taste
  • Low fat oil, for frying

Method:

  1. Boil the potato and then, peel and chop it into smaller pieces.
  2. Lightly fry the potato pieces and keep aside.
  3. Heat a little oil in a pan and lightly fry the chopped green chilli, ginger and garlic. Add the chopped tomato pieces and crushed red chillies to the pan and continue frying for a few minutes.
  4. Remove the pan from the stove and transfer its contents to a blender to grind it to a paste.
  5. Transfer the tomato paste back to the pan and heat it over a low heat.
  6. Add the fried potato pieces to the pan and salt, to taste. Stir well.
  7. Serve the tomato and potato curry with rice or pittu.

Recipe source: Raji Thillainathan.

Murukku

Today’s guest blogger is Krishanthy Kamalraj. An agriculture graduate and a former staff member of UNDP Sri Lanka’s Transition Recovery Programme, Krishanthy sent me a couple of recipes this week. As one of the recipes is for Pongal, I am happy to share her murukku recipe today. 

Kadalaima Murukku- Channa Dhal flour murukku

This snack has a prominent place in all Tamil celebrations. There are several types of murukku available and they differ based on ingredients. Today I have chosen Channa Dhal flour and Atta flour murukku.

Time taken: 1 hour

Serves 10 to 15 persons

Ingredients:

  • 1 cup roasted channa dhal flour
  • ½ cup steamed wheat flour
  • 1 teaspoon of cumin
  • 2-4 dried red chili
  • 1 teaspoon of Omam (Carom seeds/ Ajwain) powder
  • 2 teaspoon margarine or olive oil
  • ½ cup water
  • Salt as needed
  • Oil to fry
  • Murukku ural/ mould

Method:

  1. Soak the Omam powder in 1/8 cup of water for 30 minutes.
  2. In a mixing bowl, take 1 cup of roasted Channa Dhal flour and ½ of steamed Atta flour and add together.
  3. Take cumin and dry chili and grind it well until it becomes a fine powder. Add this to the flour mixture in the bowl and mix well.
  4. Filter the Omam water and gradually add to flour mixture.
  5. Then add salt and margarine to the flour mixture.
  6. Gradually add water to the mixture and make very soft, non sticky dough (same as the consistency level for string hopper dough)

murukku dough2

murukku in the mould

7. Insert clove shape disc into bottom of murukku ural and add small portion of dough into the murukku ural and press softly to make coil shaped murukku. Note: If the dough is not soft enough (due to not enough water), it will feel hard to press the ural. Add little bit of water and make the dough soft. This will result in very soft murukku.

squeezing the murukku

murukku dough

8. In a pan take required amount of oil and heat it over medium heat.
9. Once the oil is hot enough, transfer the pressed murukku into the oil.

frying murukku10. Once the murukku is cooked well on both side and has turned light golden brown in colour, take it out from the pan and drain the grease using paper towel.

Murukku

11. Keep them in an air tight container and serve whenever you feel like eating crispy, spicy snack.

Recipe source: Krishanthy Kamalraj.

Kurakkan Pittu

Kurakkan, also known as ragi, is a type of millet that is gluten-free and diabetic friendly. At home, the most common and popular form of pittu is the rice flour pittu. Occasionally, my mother makes the atta flour pittu or the kurakkan flour pittu.

Below is the simple recipe for making kurakkan flour pittu. The rice flour pittu and atta flour pittu easily blend with any curries and is a convenient meal to prepare. Kurakkan, however, has a distinctive taste that I find does not easily merge with just any curry. As such, I prefer to eat kurakkan pittu simply sprinkled with coconut and jaggery.

Kurakkan Pittu

Time taken: 25 mins

Serves 2

Kurakkan pittuIngredients:

  • Kurakkan flour/ ragi – 1 cup
  • Coconut – ¼ cup, freshly scraped
  • Jaggery – 2 or 3 tbsp, finely chopped
  • Salt – pinch

Method:

  1. Add a pinch or two of salt to the kurakkan flour.
  2. Stir in boiled and slightly cooled water until the flour mixtures becomes coarse and grainy.
  3. Steam the kurakkan pittu for 10 mins.
  4. Mix the freshly scraped coconut and chopped jaggery into the steamed pittu and serve hot.

Recipe source: Raji Thillainathan.